With web3 gaining more and more popularity, looking for ways to integrate solutions to make the web decentralized becomes critical in the process of moving forward from the deficiencies we see when using centralized solutions, such as saving files in specific service provider cloud solutions. In this article, you will learn a different way to save files in the web using IPFS, a peer-to-peer (p2p) storage network.
Table of Contents
What is IPFS?
According to the official documentation, IPFS (InterPlanetary File System) is a distributed system for storing and accessing files, websites, applications, and data. This means the data is not stored in a centralized location, but rather in multiple nodes of the network.
With typical cloud storage, you upload data and you get a link, URL, or a way to locate where the data is. This is a location identifier. On the other hand, IPFS uses a content identifier (CID).
This means, every time we upload data using IPFS, IPFS uses a cryptographic hash to generate a CID. This CID is unique as it is strictly based on the content of data or files. For instance, if by mistake you uploaded the incorrect file, and want to upload a new file, what happens with IPFS is you are uploading a new file, creating a new version of the previous file. This is different from overriding an existing file, and completing losing the content of old version of the file.
Why does IPFS matters?
IPFS will play a key role in the development of Web3 applications. For instance, it is critical to use the least amount of space when developing smart contracts. Especially due to how expensive they can be to deploy them.
Now, if you think about the amount of space it would take for storing files or images in a smart contract, that would be very expensive.
Those who think of using AWS S3 or any similar platform to store those files and pass the file keys into the smart contract might be a solution, but it defeats the purpose of Web3.
Web3 aims to be decentralized, and using services such as AWS S3 is quite the opposite of being decentralized as all the data is stored in a specific AWS region. On the other hand, when using IPFS, pieces of data are stored in different locations, or in different nodes in the network.
This allows two things:
- Users gain control back of their data, instead of being dependent on service providers
- Faster retrieval times as the data is stored in multiple nodes, hence, retrieving each piece of information form several places, perfect for distributing high volumes of data
How to Create a React App to Upload Files using IPFS and Infura
Starting the Project
Let’s create the React project using the CLI. This project will use the TypeScript template.
npx create-react-app react-ipfs-typescript --template typescriptInstall dependencies
We will only use one dependency to upload files using IPFS, which is ipfs-http-client. For this project, we use npm, but feel free to add the dependency using yarn.
npm install --save ipfs-http-clientDetecting IPFS Client
Open the App.tsx file and import the ipfs-http-client to the file. We will use the create function provided by ipfs-http-client.
import { create, CID, IPFSHTTPClient } from "ipfs-http-client";Inside the App component, create a variable called ipfs. This will store the IPFS HTTP Client, which is returned using create function, unless there are errors establishing the connection.
let ipfs: IPFSHTTPClient | undefined;
  try {
    ipfs = create({
      url: "https://ipfs.infura.io:5001/api/v0",

    });
  } catch (error) {
    console.error("IPFS error ", error);
    ipfs = undefined;
  }
This is important to do as if there we don’t have the IPFS HTTP Client, it is not going to be possible to upload the files from our app.
in here are current limitations when using IPFS in the browser. One of them is, Web APIs require or are restricted by Secure Context policies. In other words, IPFS needs to run either in HTTPS or localhost. We shouldn’t have any problems with this as we are going to leverage IPFS Infura, which runs in HTTPS.
Update the template to verify if there has been established a connection with IPFS. If ipfs is undefined display a user-friendly message.
return (
    <div className="App">
      <header className="App-header">
        {!ipfs && (
          <p>Oh oh, Not connected to IPFS. Checkout out the logs for errors</p>
        )}
      </header>
    </div>
  );
Wiring up form to upload files
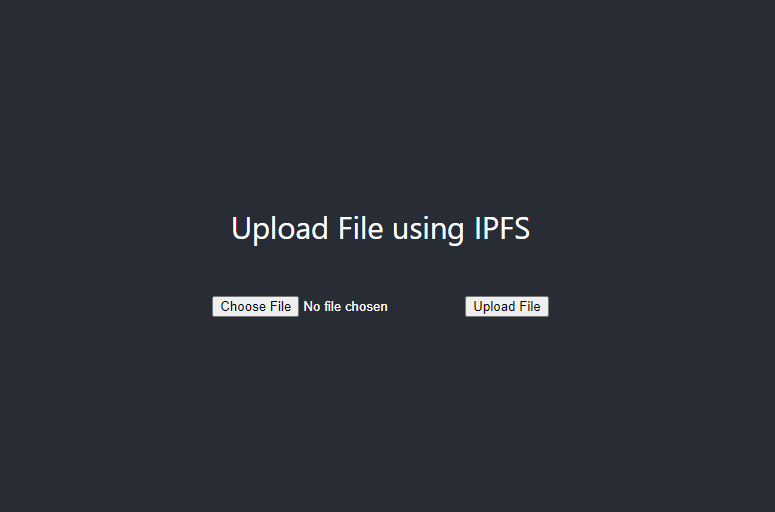
On the other hand, if we detect ipfs has an instance of IPFSHTTPClient that means we have successfully established a connection with IPFS. Hence, we can generate a simple form to upload files.
{ipfs && (
          <>
            <p>Upload File using IPFS</p>

            <form onSubmit={onSubmitHandler}>
              <input name="file" type="file" />

              <button type="submit">Upload File</button>
            </form>
          </>
        )}
Notice this form depends on onSubmitHandler function, or an event handler to upload any files selected by the user. Also, the onSubmitHandler will be in charge of updating the list of files uploaded. Hence, we will use React.useState to keep track of the files.
// add this at the beginning of the App component
const [images, setImages] = React.useState<{ cid: CID; path: string }[]>([]);
Then, add the onSubmitHandler function inside the App component.
  /**
   * @description event handler that uploads the file selected by the user
   */
  const onSubmitHandler = async (event: React.FormEvent<HTMLFormElement>) => {
    event.preventDefault();
    const form = event.target as HTMLFormElement;
    const files = (form[0] as HTMLInputElement).files;

    if (!files || files.length === 0) {
      return alert("No files selected");
    }

    const file = files[0];
    // upload files
    const result = await (ipfs as IPFSHTTPClient).add(file);

    setImages([
      ...images,
      {
        cid: result.cid,
        path: result.path,
      },
    ]);

    form.reset();
  };
The logic should be straightforward. However, this is what is going on:
- Verify a file was selected. Otherwise, notify the user no files have been selected.
- Use the
ipfs.addmethod to upload file into IPFS. - The
addmethod returns a result of typeAddResult, which contains the following propertiescid,mode,mtime,path, andsize. The most important properties is thecidas it is the unique identifier given to the file uploaded. We store thecidand thepath. We will use thepathto display image files in the app. - Update the state of the images by adding the latest file uploaded into IPFS to the array of
images.
Note 1: The ipfs.add method is not only capable of uploading files into IPFS, but also data. Feel free to upload any random text to IPFS, such as await (ipfs as IPFSHTTPClient).add('Hello World').
Note 2: This tutorial is basic, hence it doesn’t enforce other checks such as checking the file type, size, or mime type prior uploading the file. It is recommended to do so based on the requirements of your project.
Displaying files uploaded
Currently, we have the logic wired up to upload files, and even update the array of files uploaded. However, we are not displaying the files uploaded in the app. Let’s update the template to also display the files.
{ipfs && (
          <>
            <p>Upload File using IPFS</p>

            <form onSubmit={onSubmitHandler}>
              <input name="file" type="file" />

              <button type="submit">Upload File</button>
            </form>

            <div>
              {images.map((image, index) => (
                <img
                  alt={`Uploaded #${index + 1}`}
                  src={"https://ipfs.infura.io/ipfs/" + image.path}
                  style={{ maxWidth: "400px", margin: "15px" }}
                  key={image.cid.toString() + index}
                />
              ))}
            </div>
          </>
        )}
We assumed all of the files are images. Therefore, we use map method to iterate through all of the images uploaded and return an img HTML tag using the path "https://ipfs.infura.io/ipfs/" + image.path, to set up the src attribute. Consider improving the alt and style attribute to better fit your project needs.
Run the code
Run the app using the start script in the terminal.
npm run startIt should automatically open the application in localhost:3000.

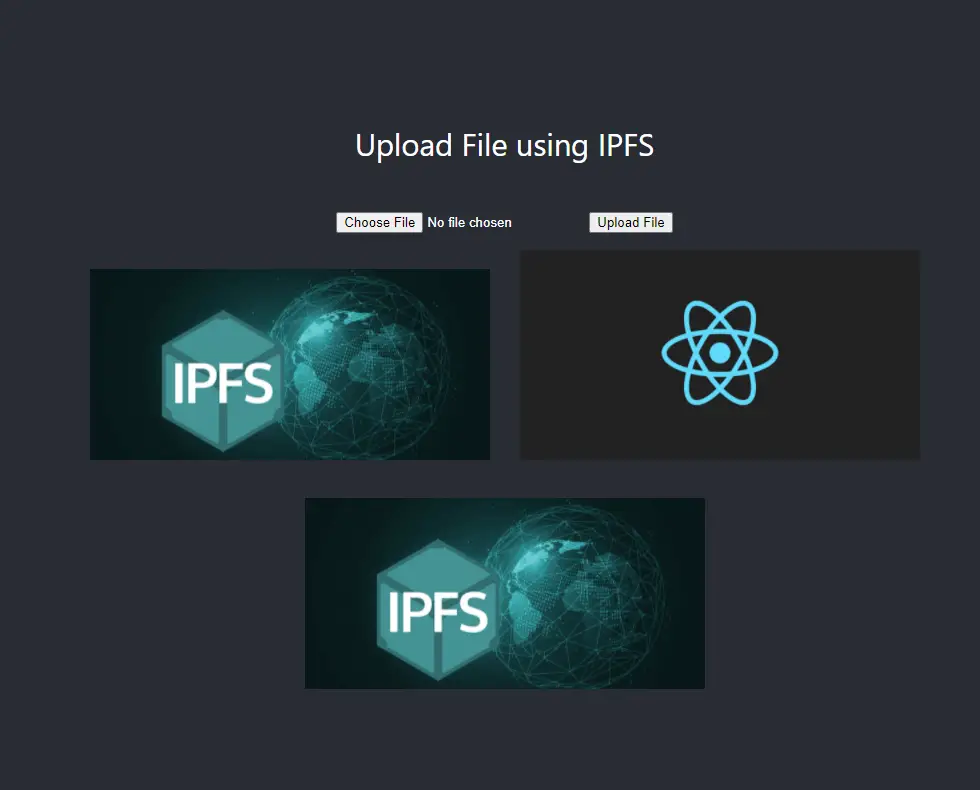
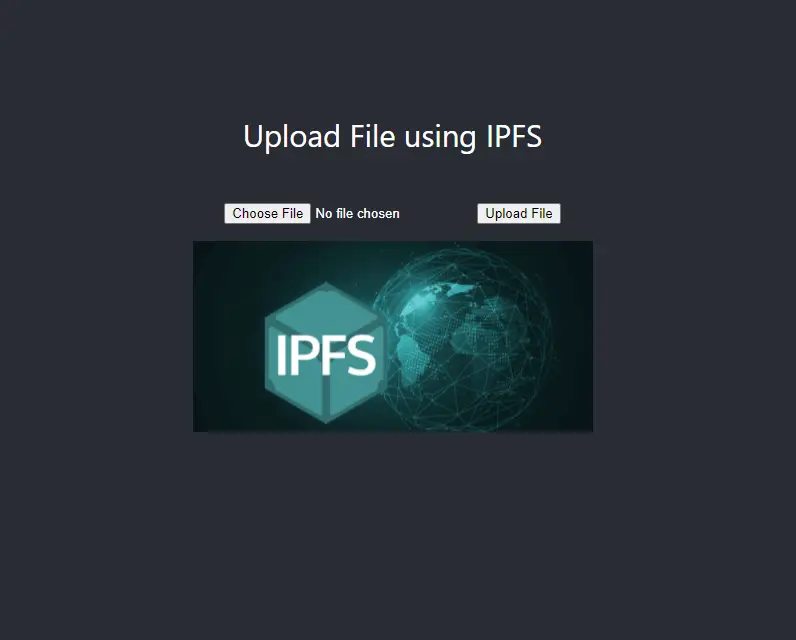
Choose a file and click the Upload File button. If there are no errors, the file will successfully be uploaded and rendered in the app. Also, the form should reset.

Remove duplicate images
If you noticed in the previous image, we uploaded the same image twice. Remember, each file gets a CID and a path as a result of using the ipfs.add method.
Add a temporary log to get information of the images uploaded.
const onSubmitHandler = async (event: React.FormEvent<HTMLFormElement>) => {
     // onSubmitHandler logic
};

// add temporary log
console.log('images ', images);
Then, use the application an upload the same image multiple times. Keep the console of the developer tools open to inspect the logs of the images.

Notice the same path and even the CID is generated for those images we uploaded multiple times. The reason is because the CID stands for content identifier. The CID is generated based on the content itself using a cryptographic hash, which by default IPFS uses SH2-256. Therefore, everytime the same file is uploaded, the same CID is generated.
Ideally, we would remove the duplicates by inspecting the CID. However, the CID is an object containing the properties hash, code, multihash, version, and more if you inspect one of the images. Instead, we will filter out duplicate images by comparing the path of the image.
Update the onSubmitHandler logic with the following, which uses a Set to easily get the unique paths, hence, unique images. Then, based on the unique paths, get the unique image object structure, which contains the properties cid and path
/**
   * @description event handler that uploads the file selected by the user
   */
  const onSubmitHandler = async (event: React.FormEvent<HTMLFormElement>) => {
    event.preventDefault();
    const form = event.target as HTMLFormElement;
    const files = (form[0] as HTMLInputElement).files;

    if (!files || files.length === 0) {
      return alert("No files selected");
    }

    const file = files[0];
    // upload files
    const result = await (ipfs as IPFSHTTPClient).add(file);

    const uniquePaths = new Set([
      ...images.map((image) => image.path),
      result.path,
    ]);
    const uniqueImages = [...uniquePaths.values()]
      .map((path) => {
        return [
          ...images,
          {
            cid: result.cid,
            path: result.path,
          },
        ].find((image) => image.path === path);
      });

      // @ts-ignore
    setImages(uniqueImages);

    form.reset();
  };
Go ahead and test this out. You should only see unique images displayed in the app after every time you upload a new image.

Adding your IPFS Infura project
If you are interested in creating your own IPFS Infura project, register for an Infura account and set up the project.
Note: While doing so, they will require a credit card to create an IPFS Infura project. At the moment of writing this tutorial, you get up to 5GB of free storage prior Infura starts charging for storage.
Note 2: You can always remove the IPFS Infura project after a while, or even after finishing this tutorial to avoid any unexpected charges if for some reason you lose your project secret keys.
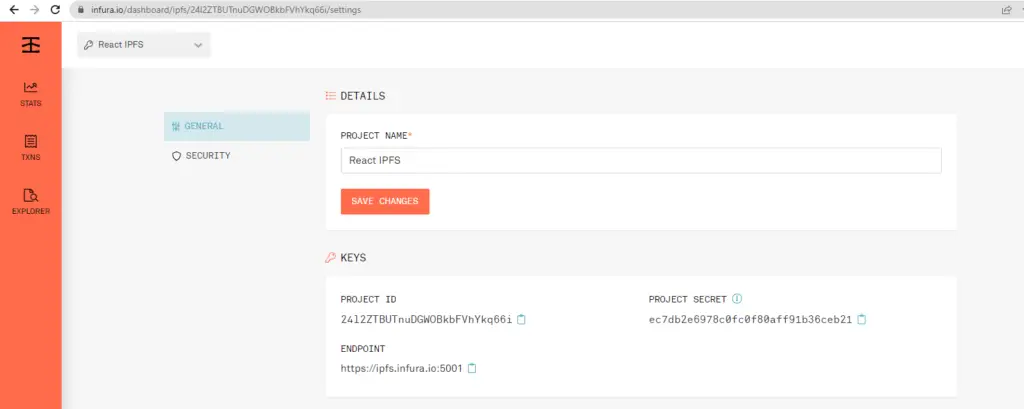
Go to the settings page of your IPFS project. You should see the project ID and project secret. Copy these values and don’t share it with anyone. We show you the values for the purposes of this tutorial.

Go back to the App.tsx file, and add the constants above the App component to store the keys. We will use them to generate the authorization key by generating a base64 of the keys using the function btoa.
const projectId = "<YOUR PROJECT ID>";
const projectSecret = "<YOUR PROJECT SECRET>";
const authorization = "Basic " + btoa(projectId + ":" + projectSecret);Note: Feel free to use environment variables for a safer alternative.
Now, we are going to update the argument passed in the create function to include the authorization in the headers.
let ipfs: IPFSHTTPClient | undefined;
  try {
    ipfs = create({
      url: "https://ipfs.infura.io:5001/api/v0",
      headers: {
        authorization,
      },
    });
  } catch (error) {
    console.error("IPFS error ", error);
    ipfs = undefined;
  }
Test the app one more time, and upload a few files.
You should see the paths of the images uploaded in your IPFS Infura project.

Full Code
Here is the full code or feel free to checkout the full version of the code in this repository.
import React from "react";
import "./App.css";
import { create, CID, IPFSHTTPClient } from "ipfs-http-client";

const projectId = '<YOUR PROJECT ID>';
const projectSecret = '<YOUR PROJECT SECRET>';
const authorization = "Basic " + btoa(projectId + ":" + projectSecret);

function App() {
  const [images, setImages] = React.useState<{ cid: CID; path: string }[]>([]);

  let ipfs: IPFSHTTPClient | undefined;
  try {
    ipfs = create({
      url: "https://ipfs.infura.io:5001/api/v0",
      headers: {
        authorization,
      },
    });
  } catch (error) {
    console.error("IPFS error ", error);
    ipfs = undefined;
  }

  /**
   * @description event handler that uploads the file selected by the user
   */
  const onSubmitHandler = async (event: React.FormEvent<HTMLFormElement>) => {
    event.preventDefault();
    const form = event.target as HTMLFormElement;
    const files = (form[0] as HTMLInputElement).files;

    if (!files || files.length === 0) {
      return alert("No files selected");
    }

    const file = files[0];
    // upload files
    const result = await (ipfs as IPFSHTTPClient).add(file);

    const uniquePaths = new Set([
      ...images.map((image) => image.path),
      result.path,
    ]);
    const uniqueImages = [...uniquePaths.values()]
      .map((path) => {
        return [
          ...images,
          {
            cid: result.cid,
            path: result.path,
          },
        ].find((image) => image.path === path);
      });

      // @ts-ignore
    setImages(uniqueImages);

    form.reset();
  };

  console.log("images ", images);

  return (
    <div className="App">
      <header className="App-header">
        {ipfs && (
          <>
            <p>Upload File using IPFS</p>

            <form onSubmit={onSubmitHandler}>
              <input name="file" type="file" />

              <button type="submit">Upload File</button>
            </form>

            <div>
              {images.map((image, index) => (
                <img
                  alt={`Uploaded #${index + 1}`}
                  src={"https://ipfs.infura.io/ipfs/" + image.path}
                  style={{ maxWidth: "400px", margin: "15px" }}
                  key={image.cid.toString() + index}
                />
              ))}
            </div>
          </>
        )}

        {!ipfs && (
          <p>Oh oh, Not connected to IPFS. Checkout out the logs for errors</p>
        )}
      </header>
    </div>
  );
}

export default App;
Interesting in Web3 Development?
I’ve written other web3 related articles I thought you will find interesting, feel free to check them out.
- Guide: How to Create a Solana Program or “Smart Contract”
- How to Connect a Web3 React App to Phantom using TypeScript
There is also more content related to TypeScript and JavaScript, and programming in general for those interested in finding new sources of information.
Conclusion
In this tutorial you learned how to upload files using IPFS using React and TypeScript. Despite IPFS innovative concept of being a decentralized solution to store files using a peer-to-peer storage network, it is fairly simple to use it with traditional applications. While this tutorial was focused on uploading files using IPFS and React, it is possible to use the same fundamentals and apply them using different frontend frameworks or even plain vanilla JavaScript.
Was this article helpful?
Share your thoughts by replying on Twitter of Become A Better Programmer or to personal my Twitter account.

