
When working on a project that utilizes NPM, you will find two files in your project root folder – the package.json file and the package-lock.json file. Most developers take note of only the former (package.json) since it’s where they write the scripts to start an application. However, what is the purpose of the two files? Why is “package-lock.json” longer? Which of these files can you do without?
The “package.json” file defines the rules required to run your application and install dependencies. On the other hand, the “package-lock.json” file holds detailed information on all the dependencies installed based on the package.json rules.
This post will guide you from scratch to better understand the two files. You will create an empty NodeJS project, build on it and see how each of these files is generated.
Table of Contents
Generate the Package.Json File
Tip: This step will require you to have NPM and NodeJS installed. Luckily, you don’t need to install the two packages separately. Download and Install NodeJS, which will automatically install NPM on your computer.
Create an empty folder anywhere you prefer on your Desktop and give it a name (say NodeAppOne). Launch the Terminal (or CMD for Windows OS) and navigate to the newly created folder. Execute the command below.
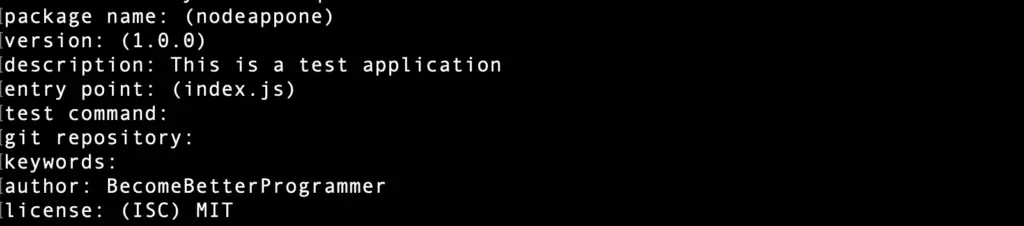
npm initThis command will give you a few prompts. You can leave most of these as they are, but for a better understanding of the “package.json” file, be sure to provide the “package name,” “description,” “author“, and “license.” Feel free to use some of the details shown in the image below.
When done, you will see a prompt to save the configurations. Type “yes” and hit Enter.
Open the project folder (NodeAppOne) using any text editor like VSCode, Sublime Text, etc. You will see the generated “package.json” file with details similar to those shown in the image below. You will also notice that there is no “package-lock.json” file.
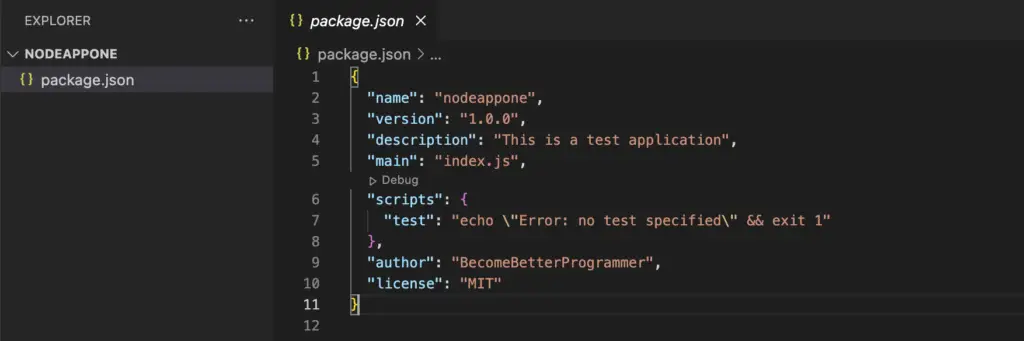
When you open the “package.json” file, you will notice that it only shows you the general information of your application—nothing much interesting at this point.
Now, install several NPM packages since that’s where all the fun begins.
Install NPM Packages
For this post, you will install two packages. The first is a “required package,” and is necessary for your app to run in production. The other is a “development package,” which is not required in production. The reason for installing the two is to give you a clear understanding of the contents of the “package.json” file.
Execute the commands below.
npm install http
npm install eslint --save-dev
When you return to your code editor, you will notice that two new entries have been generated – The “node modules” folder and the “package-lock.json” file.
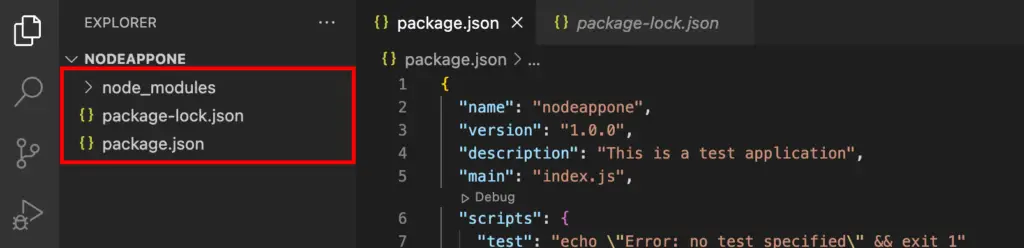
The “node modules” directory saves all the packages you download using NPM. However, this post won’t dive into that and will focus on the “package.json” and “package-lock.json” files.
The Package.Json File
If you followed each step described in this post, your “package.json” file should look similar to the image below.
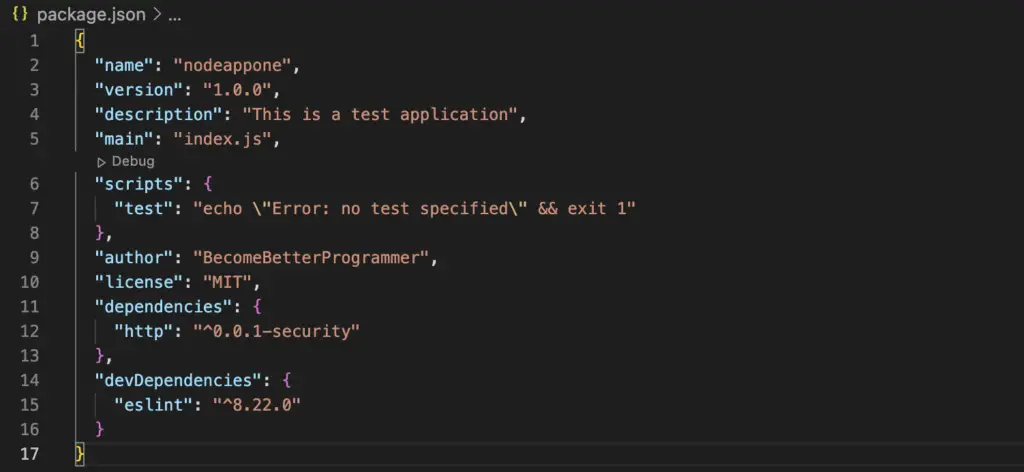
When you have an in-depth look at this file, you will notice that it contains all the meta information about your NodeJS application and version information of the installed packages. However, there are several properties this post would like you to take note of.
- Name: This option specifies the name of your application.
- Description: This option shows any additional information you provided about your application.
- Main: This option specifies the Javascript file your Node application will use as the entry point. However, it’s an optional value and only required if your entry point differs from the “index.js” file in your project root folder.
- Scripts: This section specifies your custom scripts executed with the NPM command. For example, if running a Next.JS application, you can add a line like
"dev": "next dev". Now, when you run thenpm run devcommand, you are invoking"next dev" - Dependencies: This section lists all the installed packages required to run your application. You should see the “http” package we installed in the previous section.
- DevDependencies: This section lists all the packages required by your application on “development” and not in “production.” These are packages that are installed using the
--save-devsuffix.
Important: When you look at the dependencies listed in the “dependencies” and “devDependencies” sections, you will notice that they all have a caret symbol ^ in front of the version number. E.g "http": "^0.0.1-security"
Why is this caret symbol important, and why should you take note of it?
When committing your changes on a version control platform like Git, you don’t need to push the node modules folder. Now, if somebody downloads/clones your repository on their system, they will run the npm install command, which checks the “package.json” file, downloads all the required packages, and generates a node modules folder.
The caret symbol in the “package.json” file tells NPM that it can download a higher major version of the package if available. For example, if the version indicated in the “package.json” file is “1.3.5,” NPM can install a newer version of the package, say “1.9.3”, but never “2.0.0.”
So what’s the problem with that?
What could possibly go wrong with downloading an updated package/module?
In the best-case scenario, it sounds good because your application runs an updated module with better code optimization. However, this new release might contain bugs and vulnerabilities when you look at the worst-case scenario. Also, some packages get significant updates and changes that break your application—the worst nightmare for any developer.
To solve this issue, NPM introduced the “package-lock.json” file.
The Package-lock.json File
If you followed every step in this post, your “package-lock.json” should look similar to the image below.
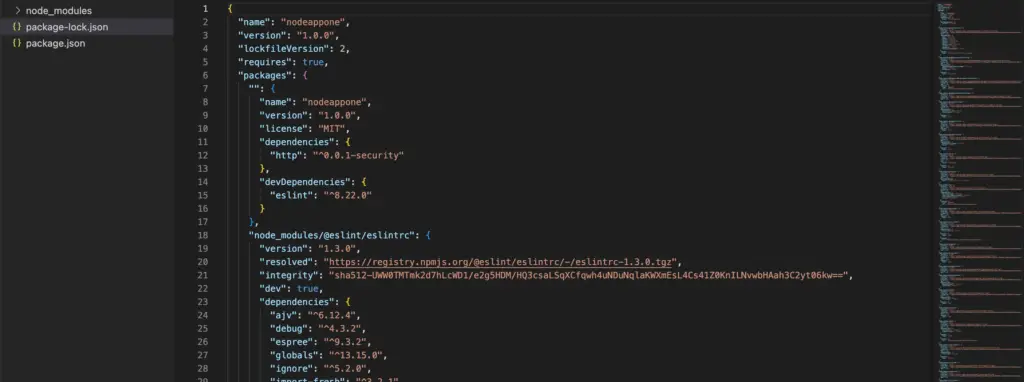
You will notice that this file is longer and contains much more information than the “package.json” file. For example, the “package.json” file in this post is only 17 lines, while the “package-lock.json” file has 2207 lines of code.
This file serves one primary purpose in your application. It locks the exact version of any dependency required by your application. Let’s understand that in-depth using an example.
This post installed the “http” module version “^0.0.1.” The “package-lock.json” file will lock this version such that even if you run the npm install command, NPM will check the “package-lock.json” file and install the exact “http” module version “0.0.1” even if there is a new release.
However, if you don’t have the “package-lock” file, NPM will use the “package.json” file and will end up installing the latest release of the “http” module.
Why is Package-lock.json Longer
This file not only locks the version of your module but also locks the version of sub-dependencies required by your module. For example, if “http” requires a module “xyz,” the “package-lock” file will also lock the version of “XYZ.”
In summary, this file locks the version of your dependency, the sub-dependency, the sub-sub-dependency, and so on.
Should you commit package-lock.json?
Up to this point, you now understand the significance of the “package-lock.json” file in your application. This post highly recommends that when you are committing your changes to Git, you don’t just push the “package.json” file but also commit the “package-lock.json” as it will save you a great deal in case of a new release of a module has bugs or vulnerabilities.
Sometimes you encounter an error in your NodeJS application, and the immediate solution has always been to delete the “package-lock.json” file. Since you now understand its significance in a Node project, always try other solutions before making that leap of faith.
Conclusion
This post has answered all the questions that you might have had concerning “package.json” and “package-lock” files. What is the purpose of the two files? Why is package-lock.json longer? Which of these files can you do without?
Although your application can run without the “package-lock.json” file, don’t cling to the notion “as long as it’s working.” It only takes one package update to break your application.
Was this article helpful?
You can also share your thoughts by replying on Twitter of Become A Better Programmer or to my personal account.