

In this tutorial, you are going to learn how to integrate Firebase Authentication into your Angular project.
If you are unfamiliar with Firebase, Firebase is a platform that allows you to quickly develop websites. If you want to learn more about Firebase, check out their website.
Table of Contents
Create a Firebase Project
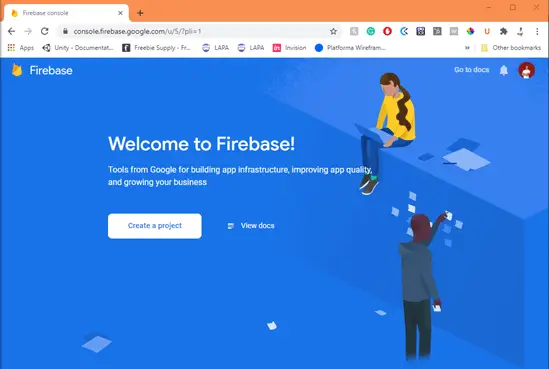
Go to https://console.firebase.google.com/, and create a new project by clicking the “Create a project” button.
PD: If you are not logged into your Google Account, it will prompt you to log in first.
Firebase will prompt you to add the project name and to accept the Firebase terms. Once you do that, click the “Continue” button.
Next, Firebase will ask whether you want to enable Google Analytics for this project. For the purposes of this tutorial, we won’t enable Google Analytics. However, feel free to enable this functionality as Google Analytics allows you to:
- Do A/B testing
- Predict user behavior
- Have user segmentation & targeting across Firebase products
- Have event-based Cloud functions triggers
- Get crash-free users
- Get free unlimited reporting
If you enabled Google Analytics, you will need to create a Google Analytics project.
Firebase has different pricing plan options. By Default, it will set the Spark plan to your project which is their Free plan. Feel free to navigate to the pricing page to get more details about other plans and their limits.
If you didn’t enable Google Analytics, click on “Create project”. Once you do this, your project will be created.
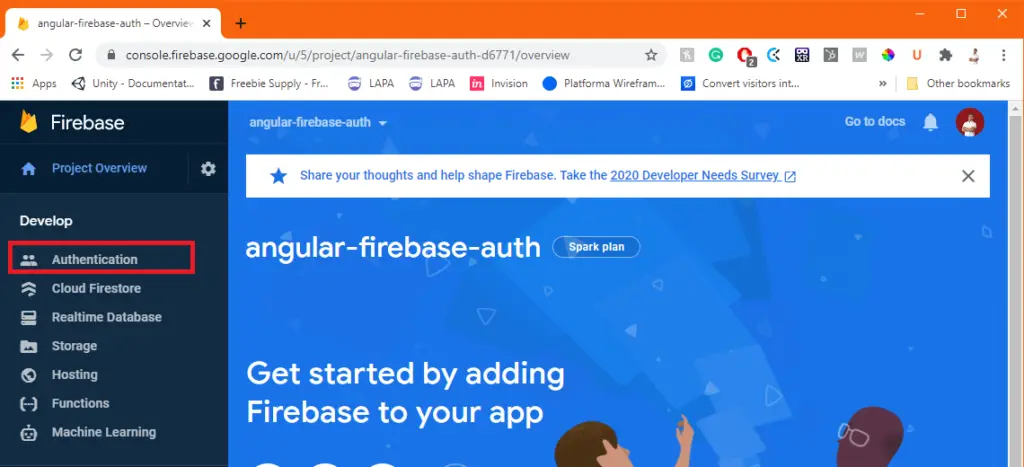
Once the project is created, navigate to the Authentication page.
Click the button “Get Started”. You will see all the different sign-in methods available.
For this tutorial, we are going to use Email/Password sign-in method.

Click the option Email/Password. Then, Firebase will prompt you to enable this option.
*There is an Email link (passwordless sign-in) option available. This tutorial doesn’t cover the passwordless sign-in method option.
Once you enable Email/Password, click on “Save”.
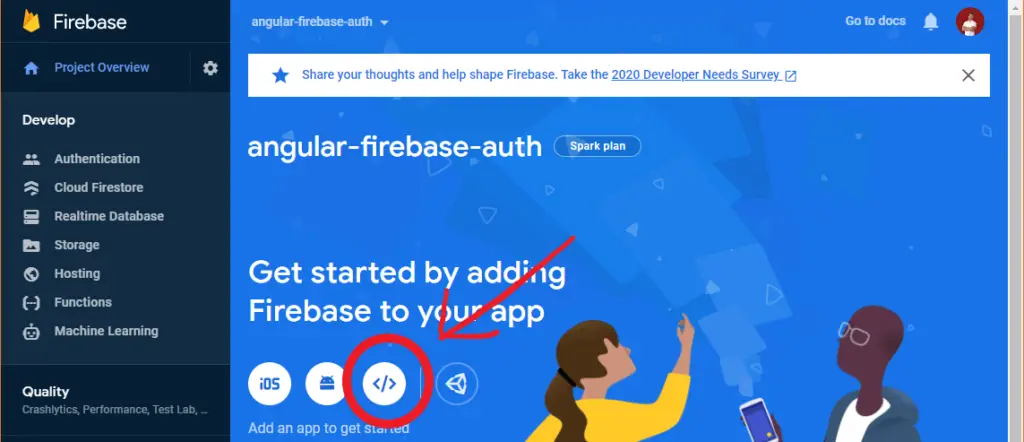
Now we are going to get the configuration needed for our project settings. In the left navigation panel, click the “Project Overview” menu option. Select, the Web option to add Firebase to a Web Application project.
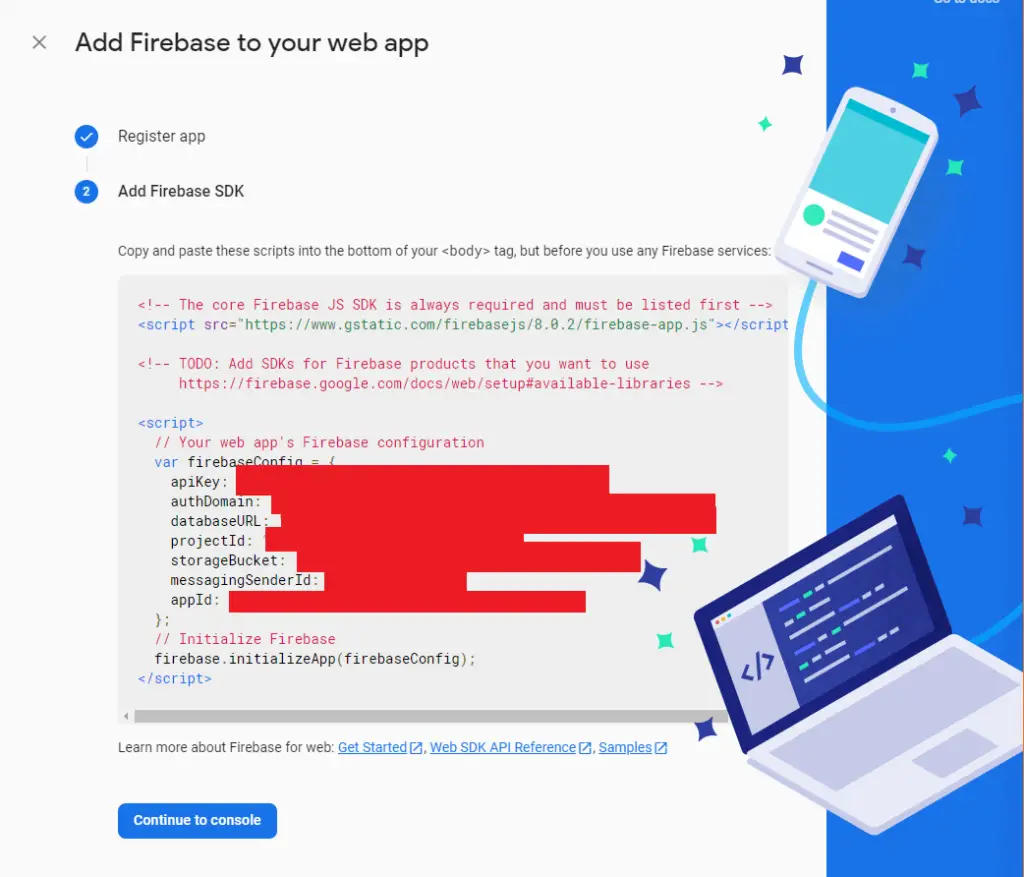
Register the app by adding a nickname. Once you registered the app, you will get the Firebase Configuration. Copy them and keep them as we are going to use it once we create our Angular Project.
Create Angular Project
First, we need to create our Angular project. Make sure to enable routing whenever the terminal asks if you would like to add Angular routing. If you have already created it, skip this step.
ng new angular-firebase-authInstall default dependencies needed to run the Angular starter project.
npm iWe need to install other packages needed for our application.
npm i --save bootstrap @angular/fire firebaseTo make sure we are using bootstrap CSS library, we are going to open angular.json file and add the bootstrap.css file path to be part of the styles property of the build configuration.
"build": {
       "builder": "@angular-devkit/build-angular:browser",
       "options": {
         "outputPath": "dist/angular-firebase-auth-test-two",
         "index": "src/index.html",
         "main": "src/main.ts",
         "polyfills": "src/polyfills.ts",
         "tsConfig": "tsconfig.app.json",
         "aot": true,
         "assets": [
           "src/favicon.ico",
           "src/assets"
         ],
         "styles": [
           "src/styles.scss",
           "./node_modules/bootstrap/dist/css/bootstrap.css"
         ],
         "scripts": []
       },
       "configurations": {
         "production": {
           "fileReplacements": [
             {
               "replace": "src/environments/environment.ts",
               "with": "src/environments/environment.prod.ts"
             }
           ],
           "optimization": true,
           "outputHashing": "all",
           "sourceMap": false,
           "namedChunks": false,
           "extractLicenses": true,
           "vendorChunk": false,
           "buildOptimizer": true,
           "budgets": [
             {
               "type": "initial",
               "maximumWarning": "2mb",
               "maximumError": "5mb"
             },
             {
               "type": "anyComponentStyle",
               "maximumWarning": "6kb",
               "maximumError": "10kb"
             }
           ]
         }
       }
     },
We are going to add Angular Material. Therefore, we are going to run the following command:
ng add @angular/materialOnce you do so, it will ask you the following questions in the terminal.
Choose a prebuilt theme name, or "custom" for a custom theme:
Set up global Angular Material typography styles?
Set up browser animations for Angular Material?
Select any prebuilt theme. Also, select Yes to set global Angular Material Typography as well as browser animations for Angular Material.
As you noticed, we installed Bootstrap and Angular Material as we are going to leverage the UI Material Design components and Bootstrap utilities to speed up the development process and have a nice UI interface without spending too much time on adding custom styling to our app. However, installing the @angular/fire and firebase packages is a requirement to wire up firebase authentication with our signup page.
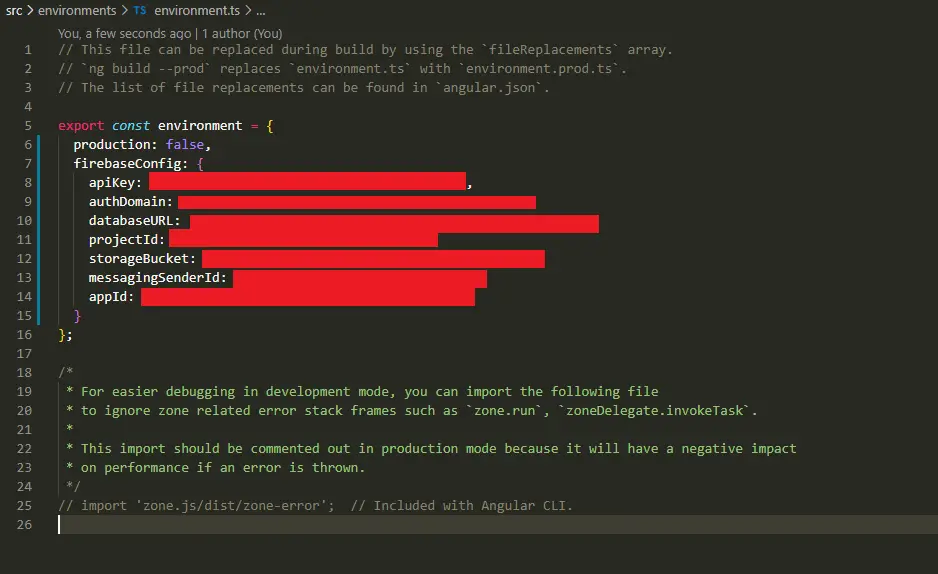
Open the environment.ts file and add the firebase configuration.
Note: It is recommended to create at least two separate firebase projects: One for production environments and one for development environment. If you have more environments, it is recommended to create one firebase project per each environment.
Create Sign Up Page
We are going to create a module for the signup page, so in your terminal, run the following command.
Note: Make sure you are in the root folder of your project when executing these commands from your terminal.
ng generate module pages/signupThen, create the SignupComponent.
ng generate component pages/signupNow it’s time to update the routes to navigate to the signup page. Open the app-routing.module.ts file and add a new route to the routes variable:
const routes: Routes = [
   {
     path: 'signup',
     loadChildren: () =>
       import('./../app/pages/signup/signup.module').then(
         (module) => module.SignupModule
       ),
   },
 ];
Open the signup.module.ts file and add the RouterModule as part of the Module’s imports. This is with the purpose of setting up the component to be used when navigating to the /signup page. Go ahead and add the FormsModule and ReactiveFormsModule as we will use them to create our signup form. Also, we are going to add some Angular Material modules as we will use them in our template.
import { NgModule } from '@angular/core';
 import { CommonModule } from '@angular/common';
 import { FormsModule, ReactiveFormsModule } from '@angular/forms';
 import { RouterModule } from '@angular/router';
 import { MatCardModule } from '@angular/material/card';
 import { MatCommonModule } from '@angular/material/core';
 import { MatButtonModule } from '@angular/material/button';
 import { MatInputModule } from '@angular/material/input';
 import { MatToolbarModule } from '@angular/material/toolbar';
 import { MatIconModule } from '@angular/material/icon';
 import { MatSnackBarModule } from '@angular/material/snack-bar';
 import { SignupComponent } from './signup.component';
 @NgModule({
   declarations: [
     SignupComponent
   ],
   imports: [
     CommonModule,
     FormsModule,
     ReactiveFormsModule,
     MatCommonModule,
     MatButtonModule,
     MatInputModule,
     MatToolbarModule,
     MatIconModule,
     MatSnackBarModule,
     MatCardModule,
     RouterModule.forChild([{ path: '', component: SignupComponent }]),
   ]
 })
 export class SignupModule { }
Create the Form
In this tutorial we are going to use Reactive Driven forms. That’s the reason we included the ReactiveFormsModule in the previous step. Feel free to use Template Driven forms if that approach fits your project best. If you decide to do so, remove the ReactiveFormsModule from the SignupModule to avoid importing unnecessary modules.
Open the signup.component.ts file. Since we are going to generate the form, we need to inject the FormBuilder. Also, we need to set a form property for the SignupComponent class.
form: FormGroup;
constructor(private fb: FormBuilder) { }
Generate the form and set the validators for the controls our form will have during the ngOnInit lifecycle hook. We are going to need username, email, and password form controls.
ngOnInit(): void {
   this.form = this.fb.group({
       username: ['', [Validators.required, Validators.minLength(6)]],
       email: ['', [Validators.required, Validators.email]],
       password: ['', [Validators.required, Validators.minLength(6)]],
     });
 }
As a recommendation, it is better to create a method that generates the form or sets the form group and call that method during ngOnInit lifecycle hook. We are helping our code to keep it clean. In my case, I decided to call my method generateForm. Add accessors for each of the form controls we added to our form (username, email and password).
const routes: Routes = [
import { Component, OnInit } from '@angular/core';
 import { FormBuilder, FormControl, FormGroup, Validators } from '@angular/forms';
 @Component({
   selector: 'app-signup',
   templateUrl: './signup.component.html',
   styleUrls: ['./signup.component.scss']
 })
 export class SignupComponent implements OnInit {
 form: FormGroup;
 get usernameControl() {
     return this.form.get('username') as FormControl;
   }
 get passwordControl() {
     return this.form.get('password') as FormControl;
   }
 get emailControl() {
     return this.form.get('email') as FormControl;
   }
 constructor(private fb: FormBuilder) { }
 ngOnInit(): void {
     this.generateForm();
   }
 generateForm() {
     this.form = this.fb.group({
       username: ['', [Validators.required, Validators.minLength(6)]],
       email: ['', [Validators.required, Validators.email]],
       password: ['', [Validators.required, Validators.minLength(6)]],
     });
   }
 }
Open the SignupComponent template and create the form. Since I have done the heavy lifting for you, you can copy and paste the following html to your signup.component.html file.
<div class="d-flex justify-content-center h-100">
  <div class="d-flex align-items-center">
    <mat-card>
      <mat-card-content class="p-4">
        <form [formGroup]="form" *ngIf="form" (ngSubmit)="onSubmit()">
          <div class="row">
            <mat-form-field class="w-100">
              <mat-label>Username</mat-label>
              <input matInput type="text" [formControl]="usernameControl" />
              <ng-container *ngIf="usernameControl.invalid">
                <mat-error *ngIf="usernameControl.required">
                  You must enter your username
                </mat-error>
                <mat-error *ngIf="usernameControl.minlength">
                  Username should have at least 6 alhphanumeric characters
                </mat-error>
              </ng-container>
            </mat-form-field>
          </div>

          <div class="row">
            <mat-form-field class="w-100">
              <mat-label>Email</mat-label>
              <input matInput type="text" [formControl]="emailControl" />
              <mat-error *ngIf="emailControl.invalid">
                You must enter your email
              </mat-error>
            </mat-form-field>
          </div>

          <div class="row">
            <mat-form-field class="w-100">
              <mat-label>Password</mat-label>
              <input matInput type="password" [formControl]="passwordControl" />
              <ng-container *ngIf="usernameControl.invalid">
                <mat-error *ngIf="passwordControl.required">
                  You must enter the password
                </mat-error>
                <mat-error *ngIf="passwordControl.minlength">
                  Username should have at least 6 alhphanumeric characters
                </mat-error>
              </ng-container>
            </mat-form-field>
          </div>

          <div class="text-center">
            <button
              mat-raised-button
              color="primary"
              type="submit"
              [disabled]="!form.valid"
            >
              Sign Up
            </button>
          </div>
        </form>
      </mat-card-content>
    </mat-card>
  </div>
</div>
Run your Angular app using the following command if you are relatively new to Angular.
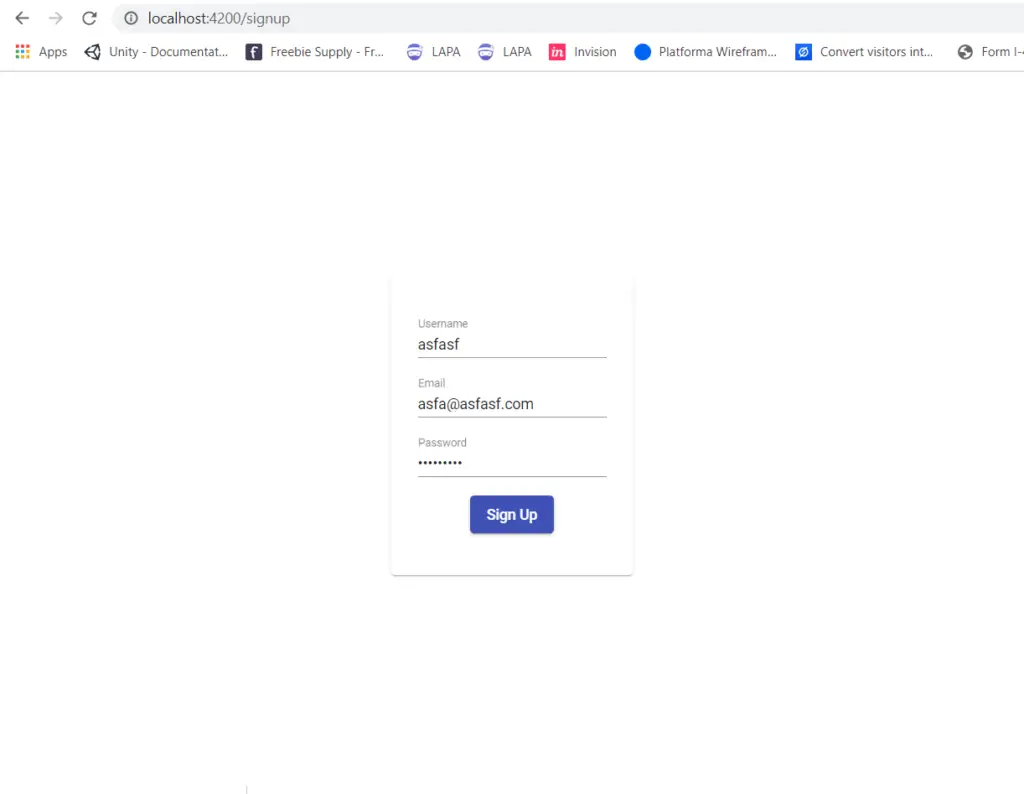
npm run startOpen the browser and navigate to the signup page. If you are using the default port used for Angular projects, the URL will be http://localhost:4200/signup. Play around with the interface (there is not too much to play besides filling up a form) and check validations are correctly triggered in the signup form.
Now we are going to wire up the signup process with firebase. For the next step, we are going to create an AuthService by running the following command.
ng generate service shared/auth/authOpen the auth.service.ts file and inject AngularFireAuth.
import { Injectable } from '@angular/core';
import { AngularFireAuth } from '@angular/fire/auth';

@Injectable({
  providedIn: 'root'
})
export class AuthService {

  constructor(
    private firebaseAuth: AngularFireAuth,
  ) { }
}
Before we set up our request to signup, we need to import AngularFireModule and also set up the firebase configuration using the config values we got from firebase that we stored in the environment.ts file. Open the app.module.ts file and add the following line of code as part of the imports required for the module.
AngularFireModule.initializeApp(environment.firebaseConfig)The app.module.ts file should look like the following:
import { BrowserModule } from '@angular/platform-browser';
import { NgModule } from '@angular/core';
import { BrowserAnimationsModule } from '@angular/platform-browser/animations';
import { environment } from './../environments/environment';
import { AngularFireModule } from '@angular/fire';

import { AppRoutingModule } from './app-routing.module';
import { AppComponent } from './app.component';

@NgModule({
  declarations: [
    AppComponent,
  ],
  imports: [
    BrowserModule,
    AppRoutingModule,
    BrowserAnimationsModule,
    AngularFireModule.initializeApp(environment.firebaseConfig),
  ],
  providers: [],
  bootstrap: [AppComponent]
})
export class AppModule { }
Then we are going to set up our signUp method. The signUp method is a request to our Firebase Authentication to create a new user for our project.
signUp(email: string, password: string, username: string) {
    return this.firebaseAuth.createUserWithEmailAndPassword(email, password)
  }
The last thing we need to do is to wire up the actual signup process. Therefore, we are going to inject the AuthService in our SignupComponent. As a way to notify whether or not the user successfully signed up or not, we are going to use Angular Material Snackbars to display notifications if the process has succeeded or failed. Therefore, we need to inject MatSnackBar to the SignupComponent.
// add the following two imports
import { MatSnackBar } from '@angular/material/snack-bar';
import { AuthService } from 'src/app/shared/auth/auth.service';

export class SignupComponent implements OnInit {
  constructor(
    private fb: FormBuilder,
    private authService: AuthService,
    private snackBar: MatSnackBar
  ) { }
Also, we are going to generate a new method in the SignupComponent to make the signup request from the AuthService once the user submits the form. Since we defined in the template that the method onSubmit is going to be triggered during the form submission, we are going to name our method onSubmit in our component file.
// this is the configuration we have in the signup.component.html file
(ngSubmit)="onSubmit()"
The method should look like this:
onSubmit() {
    this.authService.signUp(
      this.emailControl.value,
      this.passwordControl.value,
      this.usernameControl.value
    ).then(
      () => {
        this.snackBar.open('You signed up to this app!');
      })
      .catch(
        (err) => {
          this.snackBar.open('There was a problem while trying to sign up a new user');
        });
  }
Note: Feel free to modify the logic once the request is made. Usually, the new user is redirected to a new page such as the dashboard or main page. To redirect to a new page, you can inject the Router and use the navigate method.
Time to Test
The wait is over. We have done everything described in the tutorial, we followed step-by-step the process of setting up the signup page with Angular and Firebase Authentication. Now, it is time to test. Try signing up a new user on the signup page, and check if the new user has successfully signed up.

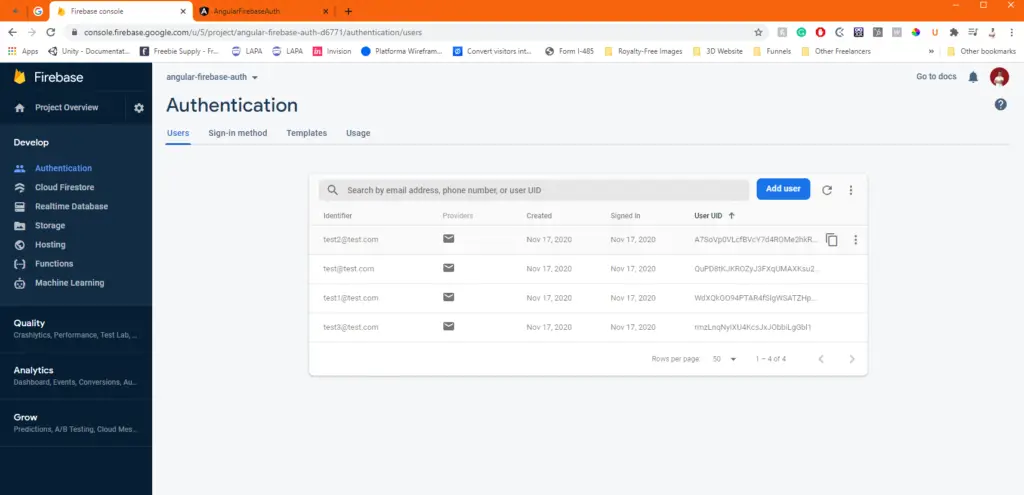
If you noticed, you received a successful notification. That means you successfully signed up for the app. In order to verify I’m not making stuff up, open your firebase project in https://console.firebase.google.com/ and navigate to the Authentication page. You will see all the users who have signed up for your application.
Attempt to Sign Up with an existing registered Email
Note: if you try to signup with an email you have previously used, you will see an error message. Firebase Authentication won’t allow multiple users with the same email.

Wrapping Up
Congratulations! Now you know how to integrate a signup page using Firebase Authentication for your Angular projects.
How was this tutorial?
If you liked this tutorial, share it with other developers who are learning Angular and Firebase. Stay connected with me by following the different social media channels available at becomebetterprogrammer.